
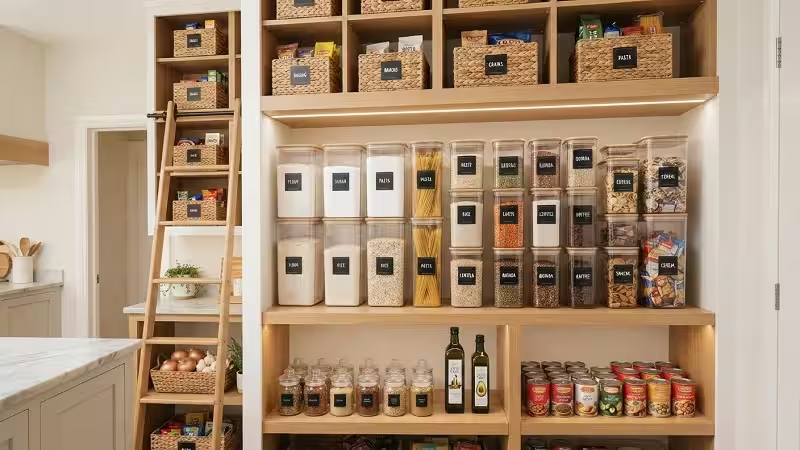
 Finding the airtight food storage containers for pantry use is essential; this guide walks you through exactly what to look for, which airtight container sets for kitchen use deserve your money, and how to organize everything so your pantry stays tidy for the long haul. For official guidance on safe dry-goods storage, see this trusted food safety reference, and check out our guide on effective long-term food preservation methods to keep your entire pantry protected.
Table of Contents
2. What to Look for When Choosing Pantry Containers
Not every container labeled “airtight” earns the name. Before you buy, understand how materials and seals affect real-world performance. These two choices decide whether your food stays fresh or your money goes to waste.
2.1 Material Choices: Plastic vs. Glass
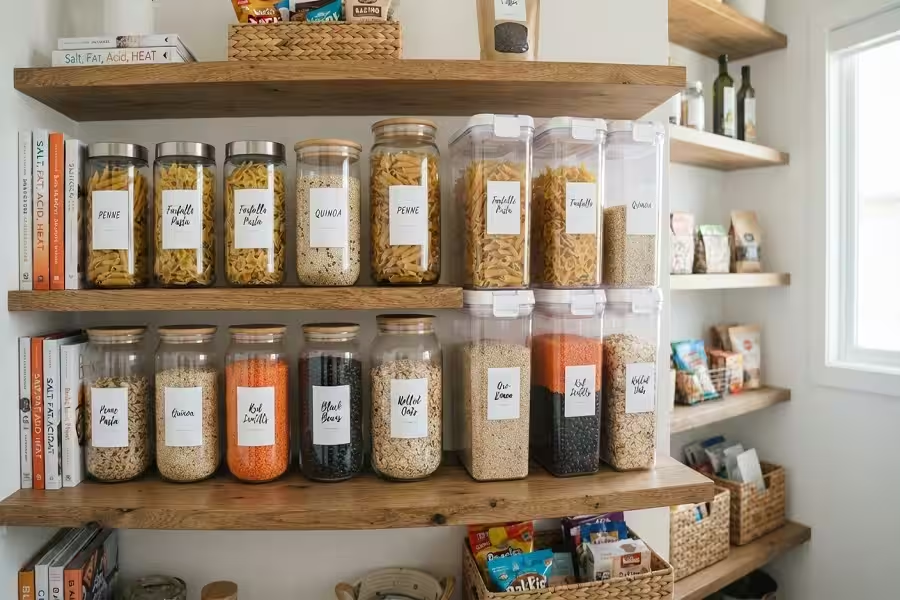
Both materials work well in a pantry, but finding the right airtight food storage containers for pantry organization means each suits different priorities.
Plastic containers dominate pantry storage for good reason. They weigh little, resist breakage, and cost less per piece. Look for clear, rigid options made from BPA-free polypropylene or Tritan, since transparency lets you see contents instantly. Plastic also stacks neatly and handles accidental drops, which matters in a busy household or a home with kids. The trade-offs? Plastic can stain from turmeric or tomato-based powders, and it may absorb odors over time. Cheap, thin plastic can also warp or crack.
Glass containers offer a different set of strengths. Glass won’t stain, absorb smells, or leach chemicals, and it stays crisp-looking for years. It suits long-term storage of spices, coffee, and loose tea especially well. However, glass is heavier, costs more, and breaks if dropped. Large glass jars can also strain upper shelves.
A practical approach is to mix both. Use lightweight plastic for bulky staples like flour, sugar, and cereal, and reserve glass for smaller items you want to display or keep flavor-pure.
| Factor | Plastic | Glass |
|---|---|---|
| Weight | Light | Heavy |
| Durability | Shatter-resistant | Breakable |
| Stain/odor resistance | Moderate | Excellent |
| Price | Lower | Higher |
| Best for | Flour, cereal, pasta | Spices, coffee, tea |
 2.2 Seal Types and Locking Mechanisms
 2.2 Seal Types and Locking Mechanisms
The seal is where an airtight claim lives or dies. Three designs appear most often.
Silicone gasket with locking latches. This is the gold standard for dry goods. A flexible silicone ring sits inside the lid, and side clips pull it tight against the rim. Because the latches apply even pressure, this design creates a dependable barrier against air, humidity, and insects. It’s the style most often found in top-rated pantry sets.
Push-button or pop-up lids. These use a spring-loaded button that creates a seal with one press. They’re fast and convenient, and you can open them one-handed while cooking. Quality varies, though, so check that the gasket sits firmly in place and the lid closes without gaps.
Screw-top lids. Common on glass jars, these seal well when paired with a rubber or silicone liner. They suit smaller items, but wide, bulky bins with screw tops can be awkward to open.
When comparing options, also check for a wide opening that fits a measuring cup, a removable gasket you can wash thoroughly, and lid compatibility, since a mismatched lid undermines even the best container. A seal that feels loose or wobbly in the store will likely let air through at home.
3. Top Picks: Best Airtight Food Storage Containers for Pantry
After comparing seal quality, material durability, capacity range, and everyday usability, these four categories cover nearly every pantry need. Each pick below reflects what to prioritize in that category, so you can match a set to your kitchen, whether you’re stocking a small apartment cabinet or a walk-in pantry.
Note on product selection: Specific models, prices, and availability change often. Check the current listing, verify the seal type, and read recent verified reviews before purchasing.
3.1 Best Overall Set for Dry Goods
 3.1 Best Overall Set for Dry Goods
Look for: A multi-size set with silicone gaskets and four-sided locking latches.
The strongest all-around airtight container sets for kitchen use combine BPA-free plastic, clear walls, and a latching lid. A well-built set typically includes sizes for every staple, from a large 4-quart bin that holds a five-pound bag of flour to a small 0.5-quart canister for baking powder or yeast.
Why this style wins overall:
- Reliable seal: Locking latches press the gasket evenly against the rim, which blocks humidity and pantry pests.
- Capacity variety: A mix of sizes means you won’t cram a small item into an oversized bin and waste shelf space.
- Easy access: Wide openings let you scoop flour or pour cereal without spilling.
- Included extras: Many sets come with labels, a marker, and measuring scoops, which saves you from buying accessories separately.
This setup suits families who cook often and buy in bulk. It handles flour, sugar, rice, pasta, oats, and cereal with equal confidence. The main drawback is cost, since a full set requires a larger upfront investment than single containers. Even so, consistent sizing and matching lids make it worth the price for most households.
3.2 Best Budget-Friendly Option
Look for: A smaller set of push-button or snap-lock containers with a removable gasket.
You don’t need to spend heavily to get decent protection. The best best pantry storage containers at a low price focus on the essentials: a reasonably tight seal, clear plastic, and a stackable shape. Skip the extras like fancy labels or bamboo lids, since they raise cost without improving freshness.
When shopping on a budget, watch for these points:
- Gasket quality: A thin or loose gasket is the most common failure point on cheap containers. Press the lid down and confirm it clicks firmly.
- Plastic thickness: Flimsy walls crack and warp, especially with heavy contents like rice or sugar.
- Set size: Buying a 6- to 8-piece set often costs less per container than buying individual pieces.
- Food-safe labeling: Confirm the packaging states BPA-free and food-grade materials.
A budget set works especially well for beginners, renters, or anyone upgrading in stages. Start with the items you use most, such as flour, sugar, and pasta, then expand over time. Expect slightly less durability than premium sets, but a well-chosen budget option still keeps bugs out and food fresh far better than original packaging.
3.3 Best Space-Saving Stackable Containers
Look for: Square or rectangular containers with flat lids and interlocking tops.
Round jars waste corner space, while square designs fit shelves with almost no gaps. That’s why stackable pantry containers in square or rectangular shapes make the most efficient use of limited cabinet space.
What separates great stackable sets from average ones:
- Flat, sturdy lids: A flat top supports the weight of containers stacked above it without cracking or sliding.
- Interlocking or recessed tops: Small grooves hold the next container in place, so towers stay steady when you open a cabinet door.
- Uniform footprint: Matching base sizes let you build neat vertical columns.
- Narrow profiles: Slim containers work well for spaghetti, snacks, and tea bags in shallow shelves.
Stacking can double your usable storage in a small pantry. Keep heavier containers on the bottom and lighter ones on top for safety. If you use a deep cabinet, pair stackable bins with a pull-out shelf or turntable so items at the back stay easy to reach. For apartments and compact kitchens, this category delivers the biggest organizational payoff.
3.4 Best Glass Containers for Pantry Storage
Look for: Borosilicate or thick soda-lime glass with a silicone-sealed bamboo, steel, or plastic lid.
Glass appeals to people who want a clean, long-lasting look. It never stains, never holds onto smells, and resists scratches from daily scooping. For storing coffee beans, loose-leaf tea, spices, nuts, and granola, glass preserves flavor better than most plastics.
Key features to check:
- Lid seal: A glass jar is only as airtight as its lid. Choose a silicone-lined lid with a clamp or screw-down design.
- Glass thickness: Thicker walls resist chips and thermal stress.
- Wide mouth: A wide opening makes filling and cleaning far easier.
- Dishwasher compatibility: Many glass bases are dishwasher safe, but remove silicone and bamboo parts first and wash them by hand.
The trade-offs are weight and fragility. Keep large glass jars on lower, sturdy shelves, and avoid placing them where children might reach. Glass also costs more per piece, so many households buy it selectively for display-worthy staples while using plastic for bulk items.
4. Comparison Table: Airtight Pantry Container Sets
Use this table to compare the four categories side by side. Prices are general ranges and may vary by retailer, set size, and season.
| Category & Top Pick | Material | Seal Type | Stackable | Best For | Typical Price Range | Main Drawback |
|---|---|---|---|---|---|---|
| Best Overall Set Rubbermaid Brilliance (View on Amazon) |
BPA-free plastic | Silicone gasket + locking latches | Yes | Flour, sugar, rice, cereal | $$$ (mid to high) | Higher upfront cost |
| Best Budget Option Chef’s Path Set (View on Amazon) |
BPA-free plastic | Push-button or snap-lock | Yes | Pasta, snacks, baking basics | $ (low) | Less durable over time |
| Best Stackable OXO Good Grips POP (View on Amazon) |
BPA-free plastic | Latching or flat-lid seal | Yes (designed for it) | Small pantries, apartments | $$ (mid) | Square shapes can be harder to pour |
| Best Glass Vtopmart Glass Jars (View on Amazon) |
Borosilicate or soda-lime glass | Silicone-lined clamp or screw lid | Limited | Coffee, tea, spices, nuts | $$$ (mid to high) | Heavy and breakable |
How to read this table: If you want one solution for an entire pantry, start with the overall set. If cost matters most, begin with the budget option and upgrade gradually. For tight spaces, prioritize stackable designs. If flavor purity and aesthetics are your focus, add glass for select items.
5. How to Organize Your Pantry Using Airtight Containers Effectively
 5. How to Organize Your Pantry Using Airtight Containers Effectively
Buying great containers is only half the job. A smart system keeps your pantry tidy and your food fresh. Follow these steps to get the most from your new setup.
1. Empty and clean first. Remove everything from your shelves. Wipe surfaces with warm, soapy water, then dry completely. Discard expired or stale items, and check for signs of pests such as webbing, tiny holes in bags, or clumped flour.
2. Group items by category. Sort food into zones: baking supplies, grains and pasta, snacks, breakfast items, and spices. Grouping makes meal prep faster and shows you exactly what you own.
3. Match container size to contents. Pour a standard five-pound bag of flour into a large container, and save small canisters for items like baking soda or yeast. Leaving too much empty space inside a container isn’t harmful, but proper sizing keeps shelves efficient.
4. Label everything. Use chalk labels, printed stickers, or a dry-erase marker. Include the purchase date or best-by date. For items with cooking instructions, such as rice or oats, tape the directions to the lid or write the water ratio on the label.
5. Store the original packaging info. Cut out the expiration date and cooking directions and keep them with the container, or snap a quick photo. This protects you if a product recall occurs.
6. Place by frequency of use. Put everyday items like cereal, snacks, and sugar at eye level. Store bulk or occasional ingredients on higher or lower shelves. Heavy glass belongs on the bottom.
7. Use “first in, first out.” When you restock, place newer items behind older ones. If you refill a container, empty it and wash it first rather than topping off old contents, which can mix fresh food with stale.
8. Keep the pantry cool, dry, and dark. Even the best containers perform better away from heat and sunlight. Avoid storing them near the stove, dishwasher, or a sunny window.
9. Do a quarterly check. Every three months, scan for expired goods, wipe shelves, and inspect gaskets for cracks or stickiness. Replace worn gaskets promptly, since a damaged seal defeats the purpose.
A few extra tips go a long way. Freeze flour, nuts, and whole grains for 48 hours before transferring them to containers if you suspect pest eggs. Keep a small silica gel packet or a food-safe desiccant in containers holding crackers or brown sugar if humidity is a problem. And always make sure food is fully dry before sealing, since trapped moisture encourages mold.
6. Frequently Asked Questions (FAQs)
What features make a food storage container truly airtight?
A true airtight seal depends on three things: a flexible silicone gasket, a locking mechanism that applies even pressure, and a rigid rim that doesn’t warp. Locking latches or a screw-down lid with a tight liner usually perform best. Press the lid closed in the store or at home. If it wobbles, gaps, or doesn’t click firmly, air and moisture will get through.
Are plastic or glass containers better for pantry organization?
Neither wins outright, since each suits different jobs. Plastic is lighter, cheaper, and shatter-resistant, so it works well for bulky staples like flour, cereal, and pasta. Glass resists stains and odors, which makes it ideal for coffee, tea, and spices. Most households do best with a mix of both.
How do airtight containers keep pantry pests away?
Pantry pests such as weevils, flour moths, and grain beetles enter through tiny gaps in packaging. A tight gasket blocks adult insects from reaching your food and stops the scent of grains from drawing them in. Containers won’t kill eggs already present in a bag, though. Freeze new flour, grains, and nuts for 48 hours before transferring them.
Can pantry storage containers go in the dishwasher?
Many can, but check the manufacturer’s label first. Most plastic bases and glass jars tolerate the top rack, while high heat can warp thin plastic. Remove silicone gaskets, bamboo lids, and any labels, and wash those by hand. Dry every part completely before refilling, since trapped moisture leads to mold.
How do I clean and remove odors from plastic pantry containers?
Wash with warm, soapy water, then soak the container for a few hours in a mix of one tablespoon of baking soda per cup of warm water. For stubborn smells, wipe the inside with white vinegar, or leave the container open in direct sunlight for several hours. Stains from turmeric or tomato powder often fade with a paste of baking soda and water. Always dry thoroughly before sealing.
Are all airtight pantry containers BPA-free?
No. Many reputable brands now use BPA-free materials such as polypropylene or Tritan, but not every product does. Look for a “BPA-free” or “food-grade” statement on the packaging or product page. If a listing doesn’t confirm it, choose a different set or switch to glass. For official food-contact guidance, review the trusted reference linked in the introduction.
This is general guidance. For details on a specific product, check the manufacturer’s care and safety instructions.
7. Final Verdict: Which Containers Should You Choose?
The best airtight food storage containers for pantry use are the ones that match how you cook, shop, and use your space. Every strong option shares the same core features: a tight silicone gasket, a dependable locking lid, food-safe materials, and a size range that fits your staples.
Here is a quick way to decide:
- Choose the best overall set if you cook often, buy in bulk, and want one consistent system for your whole pantry.
- Choose the budget-friendly option if you’re renting, just starting out, or upgrading in stages. Begin with flour, sugar, and pasta, then add more later.
- Choose stackable pantry containers if shelf space is tight. Square, flat-lidded designs can nearly double your usable storage.
- Choose glass for coffee, tea, spices, and nuts, where flavor purity and a clean look matter most.
For most homes, the smartest strategy combines two or three of these. Use plastic airtight container sets for kitchen staples, glass for flavor-sensitive items, and clear plastic food storage bins wherever you want to see supply levels at a glance. The best pantry storage containers are the ones you’ll actually use consistently, label clearly, and refill with care.
Start small. Replace the items that spoil or attract pests most often, then expand as your budget allows. Within a few weeks, you’ll notice fresher food, a tidier pantry, less waste, and faster meal prep. A good container is a small investment that pays off every time you cook.

Sarah Jenkins is a kitchen gear enthusiast and food preservation expert who tests and reviews containers, vacuum sealers, and home organization tools to help families keep their food fresh.