
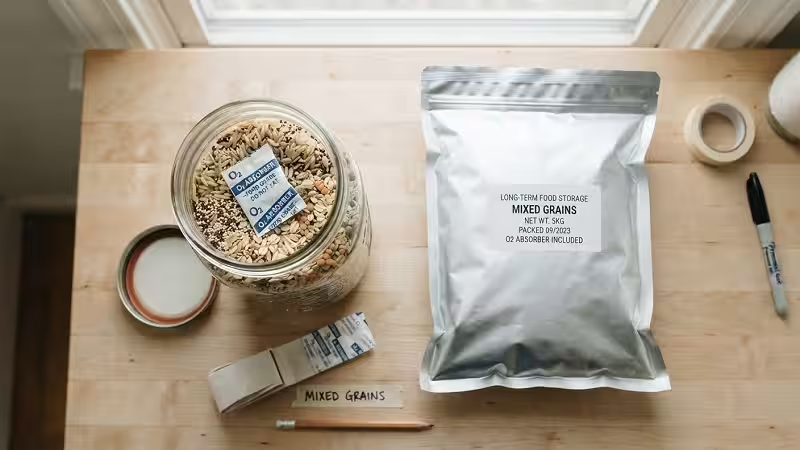
Picture this: you spend a full weekend stocking up on rice, beans, and pasta. You seal everything in buckets and tuck it away in the basement. Two years later, you open a bucket and find weevils crawling through your rice. Frustrating, right? This happens more often than people think, and the culprit is usually oxygen.
Oxygen absorbers for long-term food storage solve this problem at the source. These small packets pull oxygen out of sealed containers, creating an environment where insects can’t survive and oxidation can’t slowly ruin your food’s flavor, color, and nutrition. Preppers use them. Homesteaders use them. Everyday families building a backup pantry use them too. Ultimately, relying on high-quality oxygen absorbers ensures your preserved goods remain protected over the years.
In this guide, we’ll walk through exactly how these packets work, which oxygen absorber sizes fit which containers, and how to use oxygen absorbers correctly so your food storage actually lasts for decades instead of months.
2. How Oxygen Absorbers Actually Work
2.1 The Science in Plain English
Oxygen absorbers contain iron powder. When exposed to air, that iron rusts on purpose, and this reaction locks oxygen molecules into the packet instead of letting them float around your food. Consequently, the oxygen level inside a sealed container drops from about 21% to under 0.5% within a few days.
This matters because most insect eggs, mold spores, and oxidation reactions need oxygen to survive or progress. Remove the oxygen, and you remove the threat. Meanwhile, your food stays fresher for far longer than it would in a regular airtight container alone.
2.2 What Oxygen Absorbers Can’t Do
However, oxygen absorbers aren’t a cure-all. They don’t control moisture, so they won’t stop mold caused by humidity or wet ingredients. That job belongs to silica gel desiccants instead. Additionally, absorbers won’t help if your container isn’t properly sealed, since outside air will just replace what they remove. Think of them as one tool in a larger food preservation system, not a standalone fix.
3. Understanding Oxygen Absorber Sizes (cc) and What They Mean
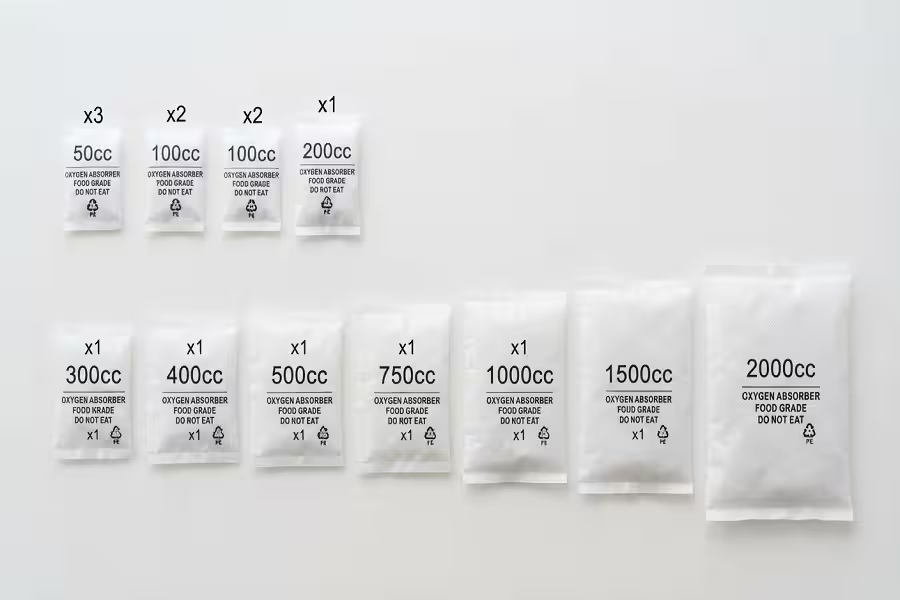
Here’s where a lot of beginners get confused. The “cc” rating on a package doesn’t refer to the physical size of the packet. Instead, it measures how many cubic centimeters of oxygen that packet can absorb. A 300cc oxygen absorber, for example, can pull 300cc of oxygen out of your container’s airspace.
Common oxygen absorber sizes on the market include 50cc, 100cc, 300cc, 500cc, and 1000cc. Smaller packets suit small jars, while larger ones handle buckets and bulk bags. When selecting your oxygen absorbers, use roughly 100cc of absorption per liter of container space for oxygen-sensitive foods like grains and beans. Dense foods need less because they leave less airspace, while fluffy foods like pasta or popcorn need more. We’ll break this down further in the comparison table below.
4. Choosing the Best Oxygen Absorbers for Your Storage Needs
4.1 Factors That Affect Which Size You Need for Oxygen Absorbers
Several things influence your ideal size. Container volume is the obvious one, but food density matters just as much. A pound of rice takes up far less space than a pound of popcorn, so it leaves more airspace that needs absorbing. Headspace also plays a role, since a loosely filled jar has more air than a packed one. Always size for the airspace, not just the container’s total volume. For a deeper dive into container compatibility, check out our guide on how to choose Mylar bags and buckets.
4.2 What Makes an Oxygen Absorber “the Best” Option
So, what separates the best oxygen absorbers from mediocre ones? First, look for individually sealed packets rather than bulk bags exposed to air. Second, choose brands that include oxygen indicator cards, which turn pink when oxygen is present and blue when your seal is working. Third, stick with reputable, food-grade suppliers rather than unbranded imports (you can review trusted industry standards on FDA food packaging guidelines). Finally, freshness matters: buy only what you’ll use within a reasonable timeframe, since even unopened packets slowly lose potency over time.
5. Oxygen Absorber Size Chart: Container & Food Type Comparison Table
Use this chart as a quick reference when planning your next storage project. Amounts assume dense, low-moisture, dry foods.
| Container Type | Approx. Volume | Recommended Oxygen Absorber Size | Best Food Types |
|---|---|---|---|
| Pint jar | 2 cups | 50cc–100cc | Herbs, spices, small seed packets |
| Quart jar | 4 cups | 100cc–200cc | Rice, beans, dried fruit, coffee |
| 1-gallon Mylar bag/jar | 16 cups | 300cc | Rice, sugar, wheat, oats |
| 5-gallon bucket (dense foods) | ~5 gallons | 1000cc–1500cc | Rice, wheat, dried beans, sugar |
| 5-gallon bucket (light/fluffy foods) | ~5 gallons | 2000cc | Pasta, popcorn, puffed cereal |
Keep in mind that fluffier foods leave more airspace, so they need noticeably more absorption power than dense grains in the same size bucket.
6. How to Use Oxygen Absorbers Step-by-Step
6.1 Before You Start: Prep and Timing
Speed matters here. Once you open a package of oxygen absorbers, they start working immediately, even before they’re inside your food container. Therefore, keep unused packets sealed in their original bag until the moment you need them. Set out your jars, bags, and food ahead of time so you can move quickly once the packets are exposed to air.
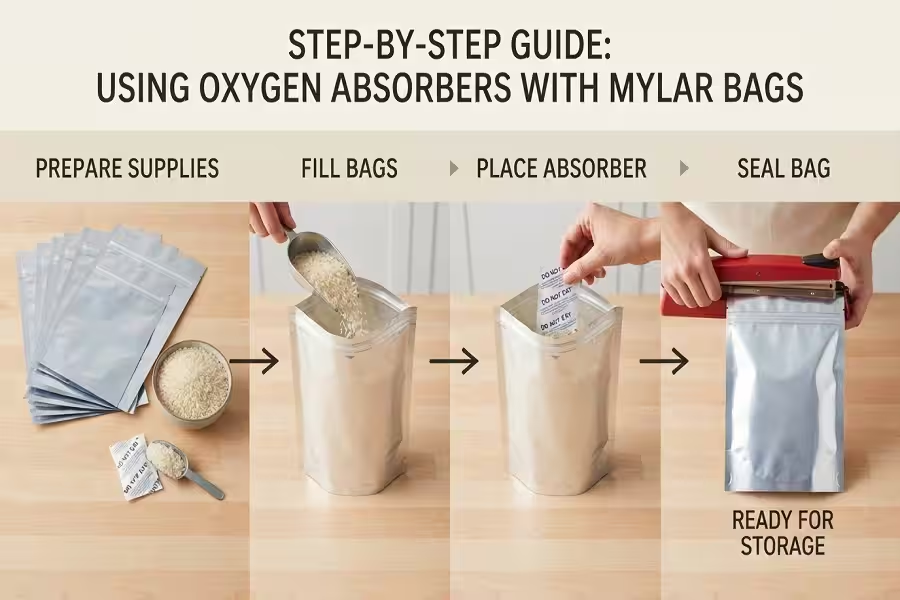
6.2 Step-by-Step Process
- Fill your container with dry, cooled food, leaving minimal headspace.
- Drop in the correctly sized oxygen absorber on top of the food.
- Remove excess air from the bag or press the lid down firmly on jars.
- Seal completely using a heat sealer, impulse sealer, or vacuum-sealed lid.
- Label the container with the food type and packing date.
6.3 Storage Conditions After Sealing
Afterward, store your sealed containers somewhere cool, dark, and dry. Basements, closets, and pantries away from direct sunlight work best. Avoid garages or attics where temperatures swing wildly, since heat shortens shelf life significantly. Stack buckets on pallets or shelving rather than directly on concrete floors.
7. Pairing Oxygen Absorbers with Mylar Bags Correctly
7.1 Choosing the Right Mylar Bag Thickness
Not all Mylar bags are equal. For long-term storage, choose bags rated 5-mil or thicker, since thinner bags puncture easily and let oxygen back in over time. Thicker 7-mil bags offer extra durability for foods stored inside 5-gallon buckets, where the bag takes on additional pressure from stacking and handling.
7.2 Sealing Techniques That Actually Work
An impulse sealer gives the most consistent, professional-quality seal, and it’s worth the investment if you’re storing food regularly. If you don’t have one, a household clothes iron on a low setting works too, run slowly along a folded edge over a flat surface. Either way, double-sealing the top edge adds extra insurance against slow leaks.
7.3 Signs of a Good Seal
A properly sealed Mylar bag will look tight and rigid, almost like a brick, with no give when you press it. The oxygen indicator card, if included, should read blue rather than pink. If the bag looks loose or you hear air hissing out when pressed, reseal it immediately before storing.
8. Common Mistakes to Avoid When Using Oxygen Absorbers
Even experienced preppers slip up occasionally. Watch out for these common errors:
- Leaving packets exposed too long before sealing, which wastes their absorption capacity
- Using the wrong cc size for your container, leaving oxygen behind
- Storing unused absorbers loosely instead of resealing them in an airtight jar
- Skipping oxygen indicator cards, which makes it hard to confirm your seal worked
- Forgetting to label containers, leading to confusion about freshness later
Avoiding these simple mistakes makes the difference between food that lasts decades and food that spoils within a year.
9. Frequently Asked Questions
How long can oxygen absorbers sit out in the open before sealing?
Ideally, use them within 15-20 minutes of opening the package. Beyond that, they absorb ambient oxygen from the room instead of your container, reducing their effectiveness once sealed inside.
Can you reuse oxygen absorbers?
No. Once exposed to air, the iron powder inside begins oxidizing and can’t be reversed. A used packet has already spent most of its absorption capacity and won’t protect a new container effectively.
Are oxygen absorbers safe for food contact?
Yes. Food-grade oxygen absorbers are approved for direct contact with food and are widely used in commercial packaging. Just avoid puncturing the packet or letting its contents spill directly into food.
What happens if you use too many oxygen absorbers in a bag?
Using extra absorbers isn’t dangerous, though it’s unnecessary once oxygen is fully removed. Some users add slightly more than needed as a safety margin, which is a reasonable practice for critical long-term storage.
Do I need oxygen absorbers for sugar and salt?
Salt doesn’t need them, since it’s naturally shelf-stable indefinitely. Sugar can technically last without them too, but adding an absorber helps prevent clumping and protects against pantry pests over time.
How do I know if my Mylar bag seal worked properly?
Check that the bag feels firm and rigid, almost vacuum-packed, within 24 hours. An oxygen indicator card turning blue confirms success, while a soft or puffy bag signals a failed seal.
Can I store leftover oxygen absorbers in mason jars?
Yes, this works well. Place unused packets in a mason jar with a tight lid, ideally with a small desiccant packet, and use them within a few months for best results.
10. Final Thoughts: Building a Food Storage System That Actually Works
Getting comfortable with oxygen absorbers for long-term food storage doesn’t require expertise, just a bit of practice and attention to detail. Match your oxygen absorber sizes to your containers, work quickly once packets are opened, and always confirm your seals before storing food away. Over time, these small habits add up to a pantry that genuinely holds up for years, not months.
Start with one bucket or a few jars, test your sealing technique, and build your confidence from there. Once you see how well a properly sealed container preserves food, you’ll wonder why you didn’t start sooner.

Sarah Jenkins is a kitchen gear enthusiast and food preservation expert who tests and reviews containers, vacuum sealers, and home organization tools to help families keep their food fresh.